Simple Steps for SQL Server Database Recovery
How to Repair SQL Files using SQL Server Recovery software:
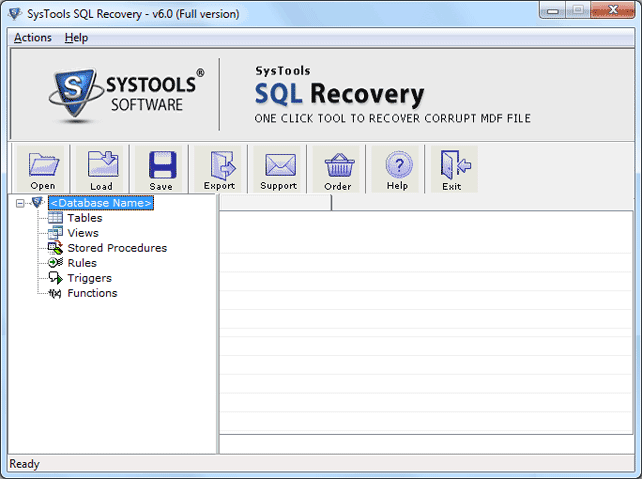
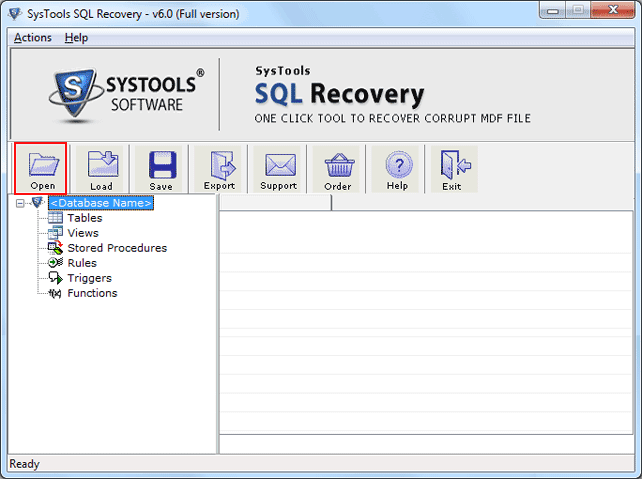
1. Firstly, you walk off to menu bar Programs »SQL Recovery » Software will illustrate you the subsequent display.
2. Click on “Open” Key and select MDF file: Watch Online Video and Check Software Full Procedure.
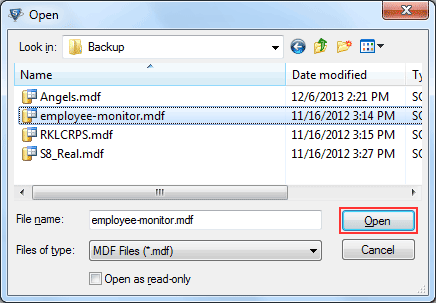
3. Select Corrupt or Damaged SQL MDF Database “Click Open”
4. Now Click “Quick Scan” or “Advance Scan” Option:

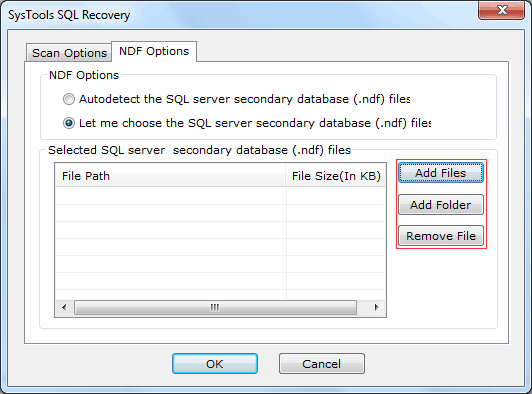
5. Choose NDF File. Click "Add Files" Necessary Message: If you want to add MDF file then, First MDF file should be in MDF file folder with Primary database.
Note: Incase if you are not getting your NDF files in your PC. Then follow few simple steps and found NDF File within few minutes. Click Start » Search » All file and Folders and type .NDF file now click search option.
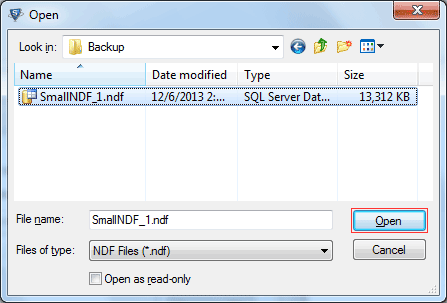
6. Now select the detected NDF file. Click Open.
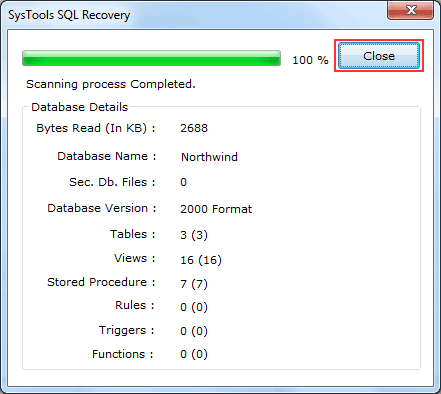
7. After Scanning, software shows you the path of MDF File, then click Recover Key to Start Recovery Process.
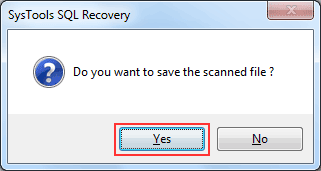
8. After Complete Recovery method, if you wish for save .str file then click “Yes”
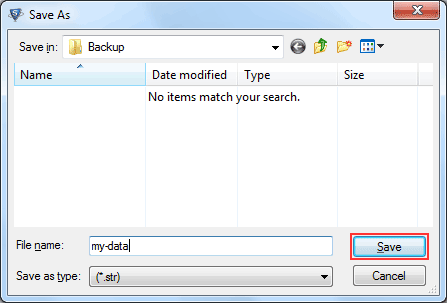
9. Choose the Place for Saving .str File
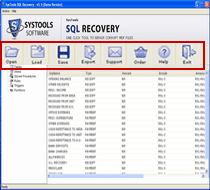
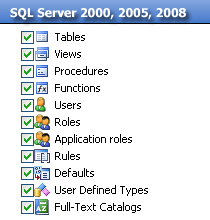
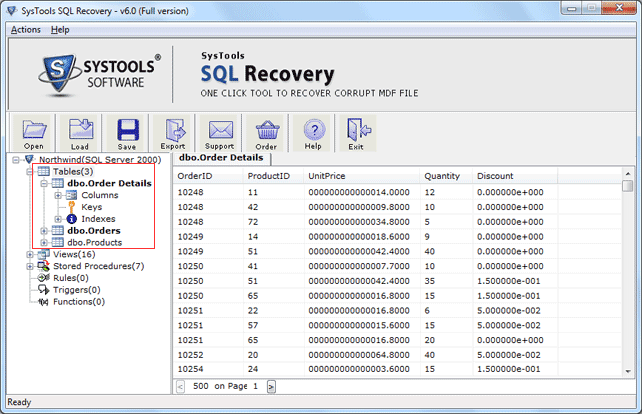
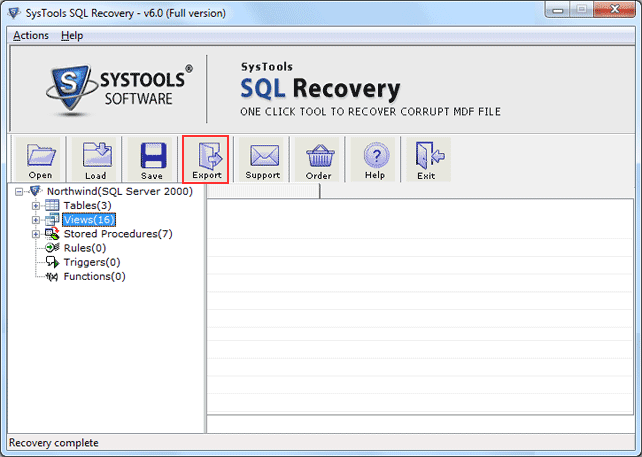
10. Software will show you “preview” the recovered SQL Objects such as, tables, stored procedures and views etc.
11. Click on the Export Option:
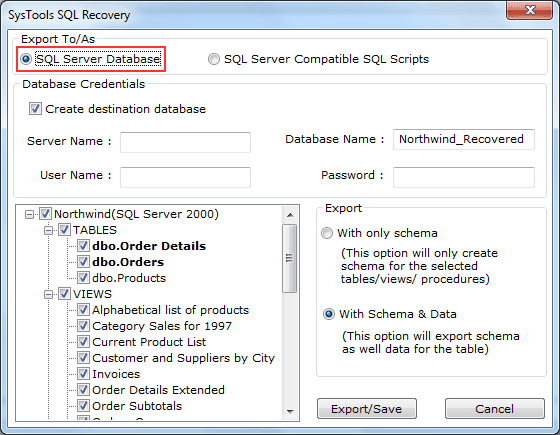
12. SQL Server Database: SQL Users Choose SQL Server Database, after choosing save or import recovered MDF file in Existing SQL server. At this time to provide the entire database ID such as: Database Name, Server Name, Username, and Password. After that Select views procedure, tables, to be saved then click on Export/Save button.
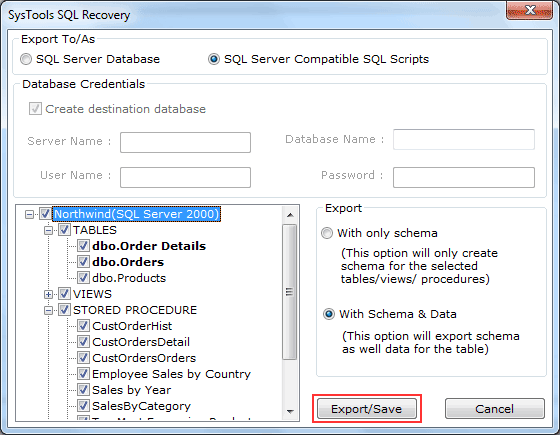
13. SQL Server Compatible SQL Scripts: If users want this option, then software will save all SQL scripts in a particular database. After that Select views procedure, tables, to be saved then Push Button on Export/Save.
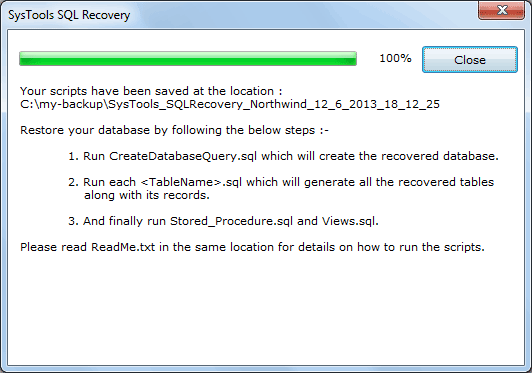
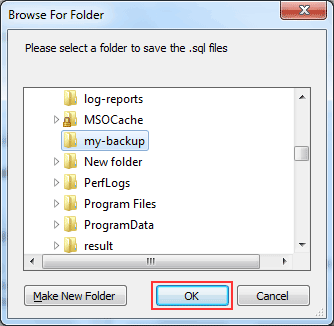
14. Choose a folder for save the .sql records, after Choosing Click “OK”
15. After Complete Process then Click "Close" Button.